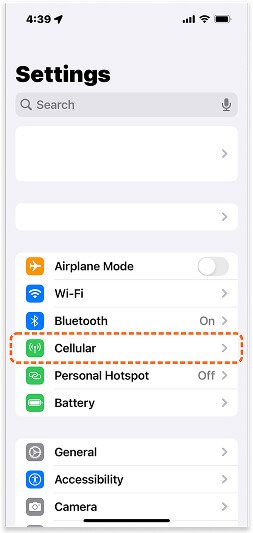
Go to your device’s [Settings], then tap [Cellular].
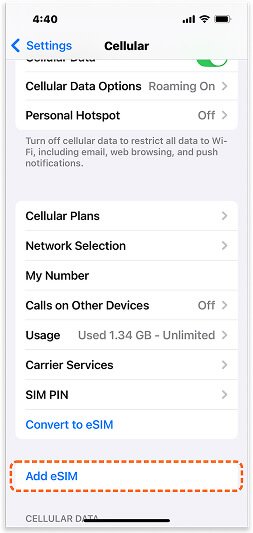
2. Add eSIM
Under the SIMs section, tap [Add eSIM] to start the setup process.
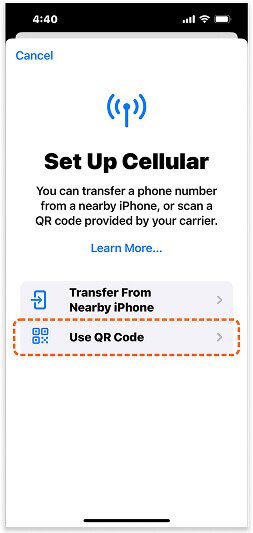
3. Choose Installation Method
Select [Use QR Code] as the installation method.
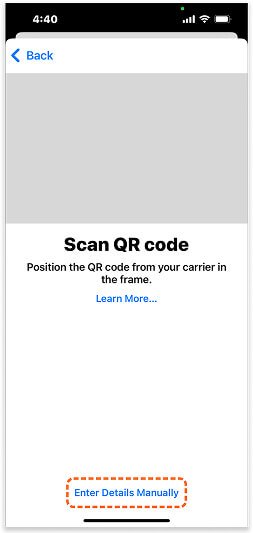
4. Manual Installation
At the bottom of the screen, tap [Enter Details
Manually].
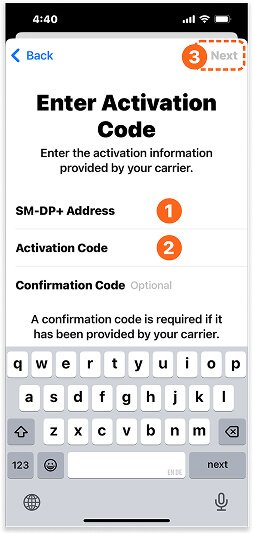
5. Enter Activation Code
Retrieve the activation code from your eSIM voucher in My eSIM or from your email. Enter the required details, then tap [Next] on the upper-right corner.
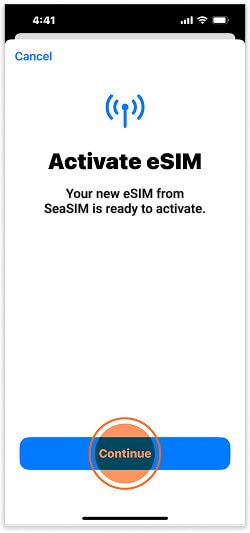
6. Activate eSIM
Follow the on-screen instructions. The activation process may take a few minutes.
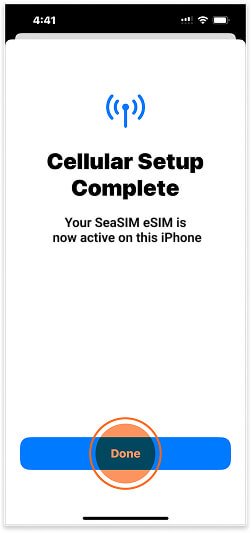
7. Complete Cellular Setup
Once the setup is finished, tap the [Done] button at the bottom of the screen.
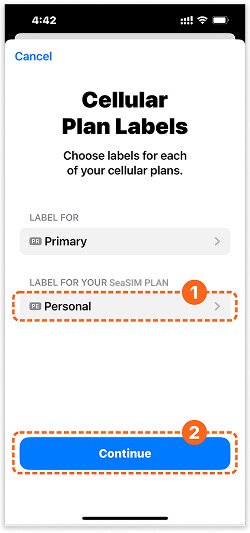
8. Label Your eSIM Plan
You can customize the name of your eSIM (e.g., label it SeaSIM), then tap [Continue].
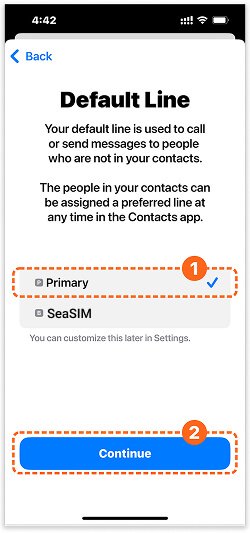
9. Set Default Line
Select [Primary] as your default line for making and receiving calls and messages.
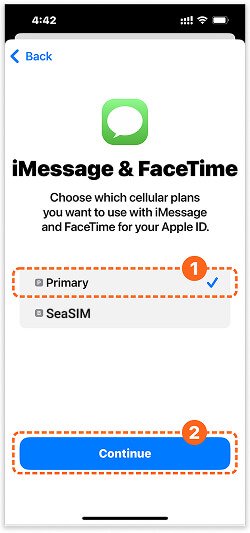
10. Set iMessage & FaceTime
Choose [Primary] as the default line for
iMessage and FaceTime.
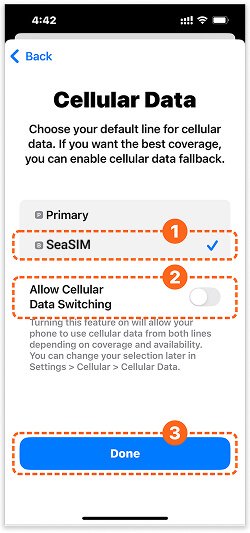
11. Set Cellular Data
Select your eSIM (labeled SeaSIM) as the default line for cellular data.
Make sure [Data Switching] is turned OFF.