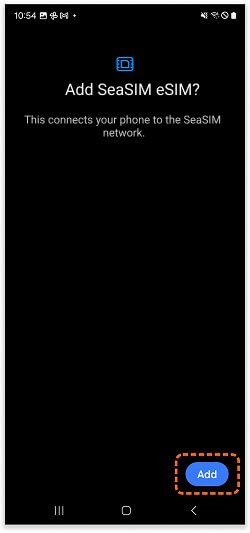
Your device will take a few minutes to process the eSIM information. Once it’s complete, tap [Add] to finalize the eSIM installation.
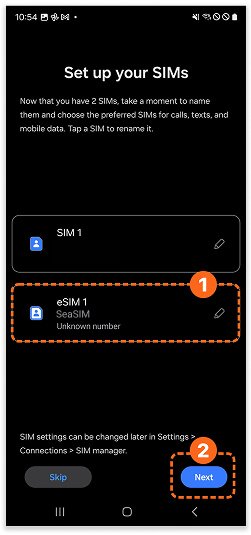
7. Edit eSIM Label
Tap edit button to rename your eSIM.You can enter any name you like— let’s use KiNSim for this example.
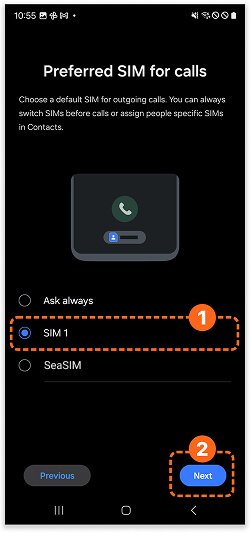
8. Set Default Line for calls
Choose [SIM 1] as your default line for calls.
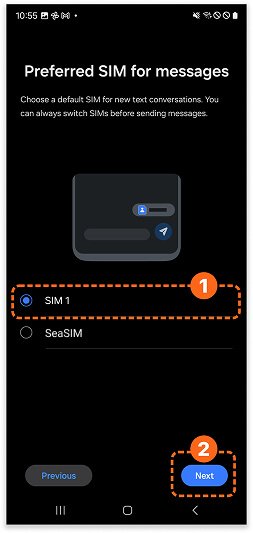
9. Set Default Line for messages
Choose [SIM 1] as your default line for
messages.
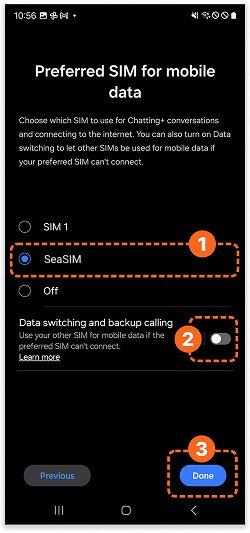
10. Set Cellular Data
Make sure Mobile Data is set to the KiNSim. For calls and messages, you can continue using your main SIM card.
Make sure [Data switching] is set to OFF.